 AUS Stock - Local Delivery
There’s plenty of advice out there on germinating cannabis seeds—some good, some not so much. Should you soak them? Use paper towels? Do they need total darkness? And what about the claim that only black seeds will sprout?
Matty Ridge, our master grower, is here to clear up the confusion and break down what actually works. Whether you’re new to growing or just want to improve your success rate, here’s how to give your seeds the best start.
Picking Winners: How to Spot Quality Seeds
Before you even think about germination, start with the good stuff. A lot of people think only dark-colored seeds will sprout, but that’s a myth. Healthy seeds come in all shades—light tan, deep brown, even tiger-striped. What really matters is firmness.
The Quick Test:
- Give your seed a gentle squeeze between your fingers.
- If it’s firm and holds up, you’re in business.
- If it cracks under light pressure, it’s probably past its prime or never fully developed.
Watch out for pale green or white seeds—those little guys are usually immature and unlikely to sprout.
Matty’s Tip: The best way to dodge dud seeds? Buy from a trusted seed bank (like us—just sayin’).
Germination Methods
Alright, you’ve got your seeds—now it’s time to get ‘em sprouting! There are a few ways to go about it, and while they all work, some might be more your style than others. Let’s break it down and find the best method for you:
1. Water Soaking Method

Want to give your seeds a little spa day before they sprout? The water soaking method is a solid way to soften up the shell and wake ‘em up. Here’s the drill:
- Fill a glass or small container with lukewarm water (around 20-25°C / 68-77°F)—not boiling, we’re not making tea.
- Drop your seeds in and let them soak for 12–24 hours. No longer! After that, they need oxygen, not a swim marathon.
- Some will sink, some will float—don’t stress. Floating seeds can still germinate just fine.
- Once they’ve had their soak, move them to the Paper Towel Method or straight into soil and let nature do its thing.
Tip: This trick works great for older seeds or those with tougher shells that need a little encouragement to crack. Just don’t overdo it—seeds left in water too long can drown, and we don’t want any casualties before the race even starts.
2. Paper Towel Method
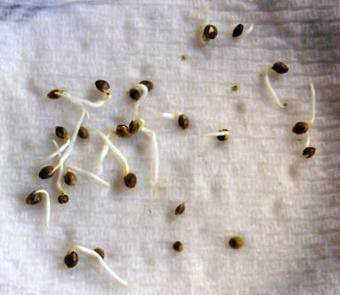
This one’s a favorite for a reason—it’s simple, effective, and lets you monitor your seeds as they sprout. Here’s how to do it:
- Dampen two paper towels—not soaking wet, just moist enough to create a humid environment.
- Lay your seeds on one towel, spacing them out to give each one room. Fold the second towel over the top.
- Place everything in a shallow container or plate and store it in a warm, dark spot (around 70-80°F / 21-27°C).
- Check daily to ensure the towels stay damp but not dripping. If they start to dry out, lightly mist them with water.
- Watch for taproots! In about 2–7 days, tiny roots should start emerging. When that happens, carefully transfer the seed into soil or a starter cube—handle the root gently, like a delicate little sprout on a mission.
Pro Tip: This method is perfect if you like to keep an eye on the process and give your seeds some TLC. Just don’t blink—some seeds sprout faster than you’d expect!
3. Soil Method
If you’re more of a “let nature do its thing” type, planting directly in soil is a solid option. It takes a little longer but is as natural as it gets. Here’s how it goes:
- Fill a small pot or seedling tray with light, well-draining soil. No need to pack it down too much—your seeds need a bit of space to breathe.
- Make a hole about half an inch deep (no need for deep burials here!) and drop the seed in. Gently cover it with soil and press down lightly.
- Water gently—don’t drown it! Keep the soil moist, but not soggy, and place your pot somewhere warm (70-80°F / 21-27°C).
Expect to see sprouts in about 7-10 days. It’s a slower process, but it’s natural and allows the seed to adapt to its new home.
Tip: Don’t bury the seed too deep, or you’ll have a tough time getting those sprouts to break through the soil. Half an inch is all you need—just enough to cover the seed, but not so deep it feels like a dig to China.
4. Starter Cubes or Seedling Plugs
Now, if you want your seeds to have the best possible start, starter cubes or seedling plugs are the way to go. These little guys keep things nice and moist, giving your seeds a perfect environment to grow in. Here’s how to use ‘em:
- Soak your starter cubes in water until they’re fully hydrated—it’s like a little spa session for your seeds!
- Pop a seed into the center of each cube and lightly press it in.
- Keep ‘em warm and moist, just like with the paper towel method.
Once your seed starts sprouting, the roots will anchor into the cube, making it easy to transplant into a larger pot without disturbing the delicate root system. This method works great for hydroponic setups or when you want more control over the environment right from the get-go.
Tip: If you’re growing outdoors, you can start the seeds in cubes indoors, then transplant ‘em into your garden once they’re strong enough to brave the elements.
5. Germination Kits
If you’re looking to keep things super simple, or you just want a foolproof setup, germination kits are a great option. They come with everything you need to get started, from trays to starter plugs, and some even include heating pads for extra warmth.
Why Use a Germination Kit?
- Consistency: Germination kits take the guesswork out of the process. They provide a controlled environment, which can make it easier for your seeds to sprout.
- Convenience: No need to go hunting for individual supplies. Everything you need comes in one package.
- Great for beginners: If you’re just starting out, a kit can simplify the process and make it easier to get the seeds sprouting without much effort.
What’s Inside a Typical Germination Kit?
A typical germination kit often includes:
- Seedling tray or propagator
- Starter plugs or cubes (usually made from peat or biodegradable materials)
- Heating mat (great for cooler climates)
- Step-by-step instructions (so you’re never left guessing)
Be Careful with Heating Pads:
Here’s a little tip: While heating pads can be super helpful in cooler conditions, you need to be cautious with them. Too much heat can actually cook your seeds, especially if they’re left in direct contact with the mat for too long. Always check the temperature, and aim for 70-80°F (21-27°C). Use the heating pad as a supplement, not the main event. You want warmth, but not a sauna for your seeds!
Humidity & Moisture Management
Germination is all about moisture, but it’s important to find the right balance. Too little, and your seed might dry out before it has a chance to sprout. Too much, and it could drown. You want to keep things humid and consistently moist, but not soggy. Balance is key.
If you’re using the paper towel method, keep it damp, not dripping. If the towel starts to dry out, mist it with water to keep things moist. If you’re using soil or a starter tray, make sure the soil stays moist without turning into a swamp.
Tip: If you want to keep humidity high, consider covering your setup with a plastic dome or wrap. But check on it regularly—if too much moisture builds up, mold or rot could follow.
Common Germination Problems and How to Avoid Them
Even with the best methods, sometimes things don’t go quite as planned. But don’t worry, it’s all part of the process. Here are a few common issues you might run into during germination, and how to avoid them:
1. Seeds Not Sprouting?
This is one of the most common frustrations, but don’t panic just yet. If your seeds aren’t sprouting, here are a few things to check:
- Temperature: Seeds need a consistent warm temperature to germinate—ideally 70-80°F (21-27°C). Too cold, and your seeds might stay dormant; too hot, and they could fry.
- Moisture: Seeds need to stay moist, but not soaked. If the paper towel or soil is too dry, your seeds may not sprout. Too wet, and they might rot. Get that balance right.
- Seed Quality: Old or poorly stored seeds are less likely to sprout. Always check the packaging and make sure your seeds are fresh from a reliable source.
Tip: If you’re really stuck, try re-soaking the seed for 12–24 hours in water that’s just below room temperature. Sometimes, all it needs is a little nudge to get things going.
2. Seeds Sprouting but Not Growing?
So your seed has sprouted, but now it’s just sitting there, looking like it’s on a permanent vacation. This could be because:
- Lack of light: Once your seedling pops above the soil, it needs light to start growing properly. Make sure it’s getting plenty of indirect light, or set up a small grow light if you’re starting indoors.
- Wrong soil: If your soil isn’t light and airy enough, it could be suffocating the seedling. Opt for a loose, well-draining mix, especially for seedlings.
- Nutrient burn: If you’ve used fertilizer too soon or in too high a dose, it can burn the young plant and stunt its growth. Hold off on fertilizers for the first few weeks.
Tip: Give your seedling some TLC with indirect light, keep the temperature steady, and resist the urge to feed it too early. Let it grow strong and healthy first.
3. Mold or Fungus Growth
Mold and fungus love a warm, moist environment, so it’s important to monitor your setup and keep it clean. If your towels or soil are too wet for too long, mold or fungus can begin to form.
- Prevention: Keep things clean! Use clean containers, and make sure your paper towels or soil aren’t staying soggy.
- What to do if it happens: If you see mold starting to grow, gently remove the affected seed or cube and replace the medium. Try a fresh towel or new soil and keep moisture levels in check.
Tip: A little ventilation goes a long way. If you’re using plastic containers or bags to keep things warm, make sure they’re not sealed too tightly—let the air circulate a bit.
Dealing with Difficult Seeds
Alright, sometimes things don’t go as planned, and your seed might take its sweet time or, worse, not sprout at all. Here’s the thing—don’t panic just yet. Seeds can be picky. If it’s been 7 days and nothing’s happening, there are a couple of things you can try:
- Check the Temperature
Seeds love warmth, but not too much. If the temperature’s too low, they might be in a bit of a slumber. Make sure your room is around 70-80°F (21-27°C). If it’s chilly, try moving them somewhere warmer. A heat mat can help, just don’t let it get too toasty! - Scrape the Seed Coat
Sometimes, the outer shell of the seed might be a bit tough, making it harder for the taproot to break through. If it’s taking too long, you can gently scrape the seed’s outer shell with a file or sandpaper to help the process along. But be super gentle—don’t go too hard or you’ll risk damaging the seed inside. - Recheck Moisture Levels
It could be that the seed isn’t getting enough moisture. Check your setup—whether you’re using a paper towel or soil—ensure it’s damp, not soaked. If the towel feels dry, spritz it with a little water. Remember, balance is key.
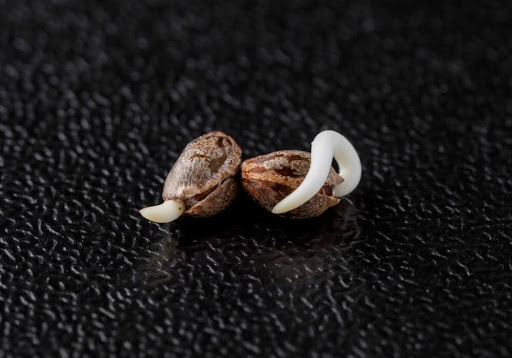
How to Tell If Your Seed Has Germinated & How Long It Usually Takes
So, your seed’s getting a little action—how do you know it’s actually germinating? The first thing to look for is the taproot. This tiny white root will break through the seed casing and start to grow. When that happens, you know it’s game on! You’ll also notice the seed casing starting to split as the taproot emerges, indicating that your seed is properly germinating.
Germination usually takes anywhere from 2 to 7 days—most seeds sprout in 24-72 hours, but don’t stress if it takes a bit longer. However, don’t worry if it takes a bit longer; each seed has its own rhythm. Some might take up to a week to sprout, especially if the conditions aren’t quite perfect. But once that taproot shows, you know you’re on the right track. Keep it steady with moisture and warmth, and your seed will keep pushing forward.
Handling Fragile Seeds After Germination
So, your seeds have sprouted—awesome! Now it’s time to treat those little guys with care, because they’re like newborns right now. Their taproots are delicate, and a little misstep can slow down their progress. Here’s how to make sure they’re off to a great start:
- Keep It Clean
Keep it clean! Whether you’re using your hands or tweezers, make sure they’re free of any dirt or gunk. You don’t want to introduce any nasties at this stage. Just a quick wipe of your hands or tools will do wonders. - Choose Light, Loose Soil
When transplanting your seedling, ensure the soil is light and airy. Dense, compact soil will stifle the roots and slow their growth. A well-aerated mix will let the taproot spread easily and thrive. - Gentle Touch, Mate
This is a delicate phase, so be super gentle. Try not to move the seedling too much. When you plant it, make sure the taproot’s facing down and just drop it in there with care. No need to rush. - Watch the Environment
Your sprout needs the right environment to keep thriving. Keep it warm (but not too hot) and humid. Aim for a temperature around 70-80°F (21-27°C). The goal is to create a cozy little spot that’s moist but not soggy.
The Role of Light During Germination
During germination, light’s not the main player. Seeds like it dark while they focus on sprouting their taproot. This helps them focus on sprouting their taproot without worrying about light exposure. But as soon as the taproot breaks free and you move the seedling to soil or another medium, low, indirect light is essential.
At this point, your seedling doesn’t need direct sunlight yet—a gentle, low-wattage light will do. LED or fluorescent lights are ideal because they provide the right spectrum of light without being too intense. These types of lights are energy-efficient, low-heat, and perfect for young seedlings. Avoid using high-wattage lights like HPS or MH during this stage—they’re too hot and intense for delicate seedlings.
Gradually, as the seedlings grow, you can increase their exposure to more direct light, but don’t rush it. Your little sprouts need time to adjust.
Conclusion
Germinating cannabis seeds might feel like a tricky task, but with a little patience and the right care, you’ll have your seeds sprouting in no time. Remember, it’s all about giving your seeds the right environment—moisture, warmth, and a bit of TLC. Keep an eye on them, adjust when needed, and don’t be afraid to troubleshoot if something doesn’t go as planned.
By following the steps we’ve covered—choosing the right seeds, using proper methods, handling seedlings with care, and keeping that balance of humidity and light—you’ll be setting your plants up for a healthy, happy start. The journey’s just beginning, but you’re on the right path.
So, grab those seeds, get your setup ready, and let nature do its thing. You’ve got this!