 AUS Stock - Local Delivery
To harvest cannabis at the perfect time, check the trichomes: milky trichomes mean peak THC, while amber indicates more sedative effects.
At Aussie Hemp Seeds, we’ve been helping cannabis growers improve their yields for many years, and we can tell you that harvesting is, without a doubt, the most delicate moment for most growers.
You have to know when to harvest your plants and what signs to look out for to confirm that they are ready.
To ensure you get it right, we’ll walk you through everything you need to know about when you should be ready to harvest marijuana, from key indicators to the best practices. You’ll be ready to maximize your yield and potency.
TLDR: Key Takeaways from This Article
- Check trichome and pistil colors to determine the ideal time to harvest cannabis.
- Harvest your cannabis in the early morning to preserve cannabinoids and terpenes. This will protect the plants from degradation from heat and light.
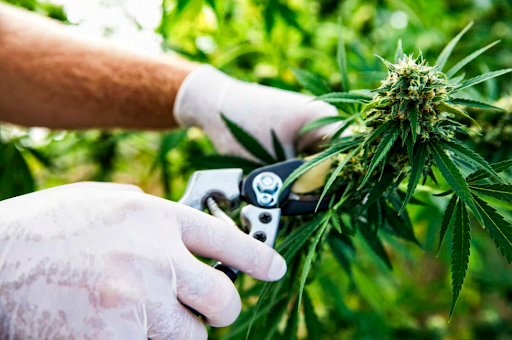
- To harvest cannabis, prepare with clean tools, a clean workspace, and necessary equipment like pruning shears, gloves, and drying racks.
- Follow a detailed guide for indoor and outdoor harvesting, including pre-harvest preparation and post-harvest practices.
- To avoid any issues as you harvest, try not to skip trichome inspections, clean tools with resin, and maintain consistent dry trim conditions.
When to Harvest Cannabis
If you harvest your cannabis at the incorrect moment, the results might not be ideal for the months of hard work you’ve put in cultivating cannabis.
That’s why once your cannabis is already flowering and ready to harvest, it’s so important to time when to harvest correctly. From our experience, here are key indicators to look for when it’s the ideal time to harvest.
Indicator 1: Trichome Color
One of the most reliable indicators of ripe and ready cannabis is the color of the trichomes—tiny, crystal-like structures on the buds.
Here’s what to look for:
- Clear Trichomes: In cannabis cultivation, clear trichomes mean your plant is not ready yet. The cannabinoids haven’t fully developed just yet.
- Milky/Cloudy Trichomes: If it’s milky white, then it’s the sweet spot. Milky trichomes mean peak THC levels—maximum potency.
- Amber Trichomes: These ones indicate the THC is starting to degrade into cannabinol (CBN), which can produce a more sedative effect. Harvesting at this stage is ideal if you want a more relaxing high.
Indicator 2: Pistil Color
Pistils, or the hair-like structures on the buds, also change color as the plant matures.
Here’s what to look for:
- White Pistils: If most pistils are still white and straight, your plant needs more time.
- Orange/Brown Pistils: When 70–90% of the pistils have turned orange or brown and curled in, it’s a good sign your cannabis is ready for harvest.
However, with pistils, note that it isn’t always foolproof. Handling cannabis buds or accidentally brushing against them can also cause pistil color to change prematurely.
Indoor vs. Outdoor Differences With These Indicators
- Indoor:
Indoor cannabis growers have the luxury of controlling the environment, which guarantees a more consistent maturation process. If you’re an indoor grower, trichome and pistil colors will be your primary indicators to harvest weeds.
- Outdoor:
Outdoor growers have to consider additional factors like weather conditions and daylight hours. If that’s you, keep a close eye on the trichomes and pistils, but be prepared to harvest early if bad weather threatens your crop.
Best Time of Day to Harvest Cannabis
When growing cannabis and it becomes evident that the plant is ready for harvest, the time of day you choose to harvest can impact the quality of your cannabis.
The best time to harvest your buds is in the morning and late evening. We love to harvest marijuana plants in the morning. This is because:
- Early Morning: Harvesting in the early morning is ideal because the plant’s terpenes and cannabinoids are at their peak. The cooler humidity and temperature also help preserve these compounds.
- Avoid Midday: Try to avoid harvesting in the heat of the day, depending on the ambient temperature. Prolonged heat and light exposure can significantly degrade the quality of cannabinoids and terpenes, giving you a less potent crop.
Table: Harvesting at Different Times of Day
| Time of Day | Benefits (or Risks) |
| Early Morning | Maximum cannabinoid and terpene preservation |
| Midday | Higher risk of degradation due to heat and light |
| Late Evening | Preserve the delicate terpene profiles, which contribute to the unique aroma and flavors of the buds. |
How to Harvest Cannabis
This section goes right into the details you need to harvest your cannabis plants. Many growers often employ pre-harvesting and post-harvesting practices when determining the harvest method to employ.
Every experienced grower will tell you it’s an art and a science. It requires precision, patience, and the right tools.
Pre-harvest preparation and post-harvest practices
Preparing well, whether for an indoor harvest or outdoor harvest can make the harvesting process a lot smoother and more efficient. Let’s start with the pre-harvest prep.
Pre-Harvest Preparation
Get everything ready first. Do not start cooking without your ingredients and tools laid out.
- Clean Your Space: Make sure your harvesting area is clean and free from dust and contaminants prior to the harvest window. The more sterile your environment, the less chance of contaminating the precious buds you’ve worked so hard to grow.
- Sterilize Your Tools: Use rubbing alcohol to sterilize your scissors or pruning shears. Clean tools help avoid any contamination when you harvest your weed.
- Gather your equipment: Trimmed buds are the eventual outcome of a successful marijuana harvest. Hence, you’ll need sharp scissors, gloves, drying racks, and some containers.
Seeking to try out some new cannabis seeds? Check us out at Aussie Hemp Seeds for feminised seeds that will produce the high-potency, seedless buds that cannabis enthusiasts love. Shop for seeds that have been tried and tested.
Harvesting Cannabis Indoors. How to Go About It?
Growing indoors? You have the luxury of controlling your environment. This means you can optimize conditions when it’s time to harvest and during drying.
Equipment We Recommend for Harvesting (And Their Uses)
- Pruning shears: We advise you to use these to cut the branches and stems precisely, especially when the buds are ready. Pruning shears are pretty much indispensable.
- Gloves: You’ll need gloves to keep your hands clean and prevent oils from your skin from transferring to the buds.
- Magnifying glasses or microscopes can sometimes be helpful with checking trichome development.
- Drying racks: You’ll need them in a cool, dark drying room to hang your buds and allow for proper airflow, especially when you dry for several days.
- Dehumidifier: This machine will keep humidity levels in check during the drying process. Proper humidity levels (usually around 45–55%) are crucial to prevent mold growth and ensure a smooth drying process.
- Storage Jars: We never harvest without airtight jars to cure our buds.
Step-by-Step Indoor Harvesting Guide
- Inspect the Trichomes: I can’t overemphasize this one. Use your magnifying glass to check for the ideal trichome color. Remember, milky to amber is your color goal.
- Prepare Your Workspace: Clean and organize your harvest area. You’ve got to make sure your tools are sterilized and ready to go.
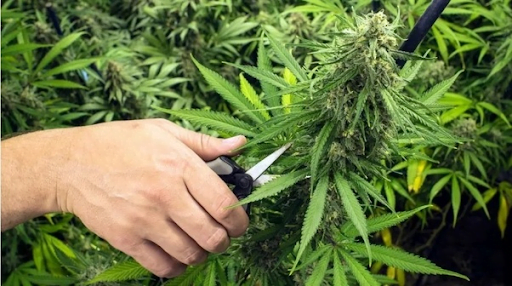
- Cut the Branches: Now, use your pruning shears to cut each branch off at the nodes, where it meets the main stem.
- Some growers prefer to cut the whole plant off at the stem for drying.
- Trim the Leaves: Trimming involves pruning from the large fan leaves, then move to the smaller leaves around the buds. This step is important for ensuring a smooth drying process when it’s time to harvest your cannabis.
- Hang the branches: Once you trim, place your trimmed branches on drying racks in a cool, dark room with good ventilation, and hang them upside down.
- Monitor Drying Conditions: Since you’re indoors, keep the temperature of the room around 60-70°F and humidity at 45-55%. Use a dehumidifier if needed.
Mistakes to Avoid when Harvesting Indoors
Make sure you’re not making any of these missteps:
- Skipping Trichome Inspection: Failing to inspect trichomes can lead to premature or delayed harvesting, significantly impacting the potency of your cannabis.
- Using Dirty Tools: I know they’re just plants, but the tools you use can introduce fungi and other pathogens, significantly increasing the risk of contamination and mold.
- Inconsistent Drying Conditions: Excess moisture can lead to mold growth and degrade the quality and potency of your weed plants.
Tips for Best Results
- Use a Hygrometer to accurately monitor humidity levels.
- Label your Jars to keep track of different strains and their curing progress.
- Handle the plants as gently as your hands can, to preserve trichomes (and avoid damaging the buds).
Harvesting Cannabis Outdoors. What To Do
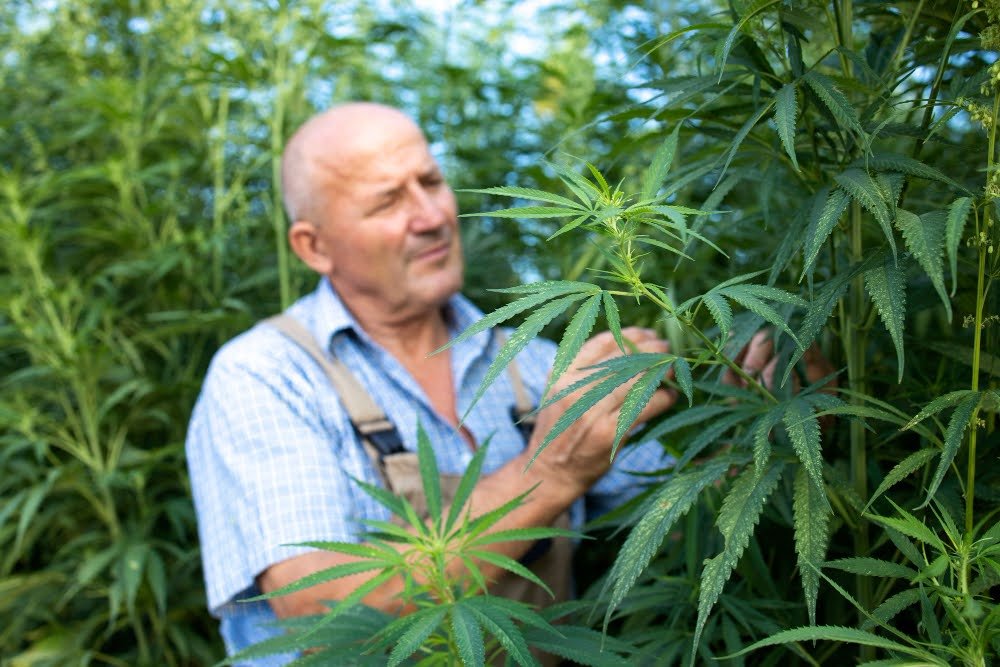
Outdoor harvesting comes with its fair share of challenges and rewards.
If you’re an outdoor grower, you know that you’re at the mercy of the elements, you’re dealing with nature — but with the right approach, you can achieve stellar harvesting results.
You can check out our collection of fast-growing, high-yield feminised seeds here.
Equipment Needed and Their Uses
Almost the same equipment as indoor, but with slight differences.
- Pruning Shears: For precise cutting of branches and stems.
- Gloves: To protect your hands and prevent contamination.
- Magnifying Glass: To inspect trichomes closely.
- Drying Racks: For hanging trimmed branches.
- Weatherproof Tarps: To protect drying buds from unexpected rain.
- Storage Jars: Airtight jars for curing.
Step-by-Step Outdoor Harvesting Guide
Except for weather monitoring, the standard guide doesn’t change. The procedure
- Inspect the Trichomes
- Prepare for Harvest: Choose a cool day for harvesting to avoid light and heat issues.
- Cut the Branches
- Trim the Leaves
- Hang the Branches
- Cure the Buds: Once dried, place the buds in airtight jars. The ready-for-curing buds will be burped daily for the first week, then reduced to once every few days. Store them in a cool, dark place.
- Monitor Weather Conditions: Use tarps to protect drying buds from rain and excessive humidity.
Mistakes to Avoid
- Ignoring Weather Forecasts: This is the tricky part for most outdoor growers. You need to pay attention to weather forecasts. We use weather apps for that. Unexpected rains can treat you with mold and mildew.
- An Improper Drying Setup Increases the risk of contamination and mold.
Tips for Best Results
- Choose Your Harvest Days Intelligently: Aim for dry, sunny days to avoid moisture issues.
- Use Hygrometers and Thermometers: When plants are hung, these tools are used to monitor drying conditions accurately.
- Store the Right Way: Store cured buds in a cool, dark place to maintain potency and flavor.
Common Mistakes to Avoid When Harvesting Cannabis
Even the most seasoned growers can make mistakes. And we’ve talked about a few of these common mistakes already.
In case you missed it:
- Harvesting Too Early or Too Late:
Timing is everything. Harvesting plants too early can result in lower potency and yield, while harvesting too late can increase CBN levels, making the cannabis more sedative (Too early means lower potency, too late means more sedative effects.)
- Rough Handling:
Handle your buds gently to avoid damaging the delicate trichomes. Rough handling can reduce potency and affect the overall quality of buds that are ready for harvest.
- Improper Drying:
Ensure your drying area has good airflow to prevent mold and mildew. Inconsistent drying conditions can lead to degradation of cannabinoids and terpenes.
- Skipping Trichome Inspection:
Always check the trichomes with a magnifying glass to determine the perfect harvest time.
- Using Dirty Tools:
Sterilize your tools to avoid contamination and mold growth on your buds.
Drying and Curing Cannabis

Drying is still a huge part of cannabis harvesting. You get it wrong, and again, all that work done previously goes down the drain. It can take some time to dry and cure, but it’s well worth the effort.
The Drying Process
- Temperature and Humidity: Keep the drying area at around 60-70°F with 50-60% humidity. This environment helps to slow down the drying process, which preserves cannabinoids and terpenes.
- Airflow: Good airflow is crucial. Use fans to circulate air, but don’t point them directly at the buds to avoid over-drying.
A Good Drying Setup
We’ve talked about using a good drying setup multiple times. What does it look like?
You don’t want mold, and you don’t want your buds to lose their flavor. So here’s what you do:
- Temperature and Humidity: Keep the drying area at around 60-70°F with 50-60% humidity. This slow-drying process helps preserve cannabinoids and terpenes.
- Airflow: Good airflow is crucial. Use fans to circulate air, but don’t point them directly at the buds. You’re not trying to create a windstorm, just gentle airflow.
- Darkness: Light degrades THC, so keep your drying area dark. Use a green light if you need to work there, as plants don’t react to that spectrum.
- Drying Racks: Hang your branches upside down on a rack or line. Make sure there’s space between them for air to circulate. Overcrowding can lead to mold.
- Dehumidifier: If you live in a humid area, a dehumidifier is your best friend. It keeps that moisture level right where it needs to be.
Curing Process
Curing further enhances the flavor and potency of your cannabis. Here’s how we treat the bud when they are ready for curing:
- Jar the Buds: Once dried, place the buds in airtight glass jars.
- Burping: Open the jars for a few minutes daily for the first week to release moisture.
- Storage: After a week, reduce burping to once every few days. Store the jars in a cool, dark place.
Final Thoughts
These detailed harvesting guidelines will help you harvest high-quality cannabis that is potent, flavorful, and free from common harvesting mistakes.